So your ready to make your new keeb yours!
More up-to-date guide on my new website
keyboard-hoarders.com
This is a quick little guide for those of you who wish to change or add things to your keymap. This guide will work for all the keyboards running ZMK. I have crap grammar so bear with me.
1. Go to my GitHub and find the desired keyboard's base keymap. This example uses a basic Corne Keyboard with 6 columns, but it will work the same for the 5-column version. [GitHub Repository](https://github.com/KeyboardHoarders/zmk-config-corne)
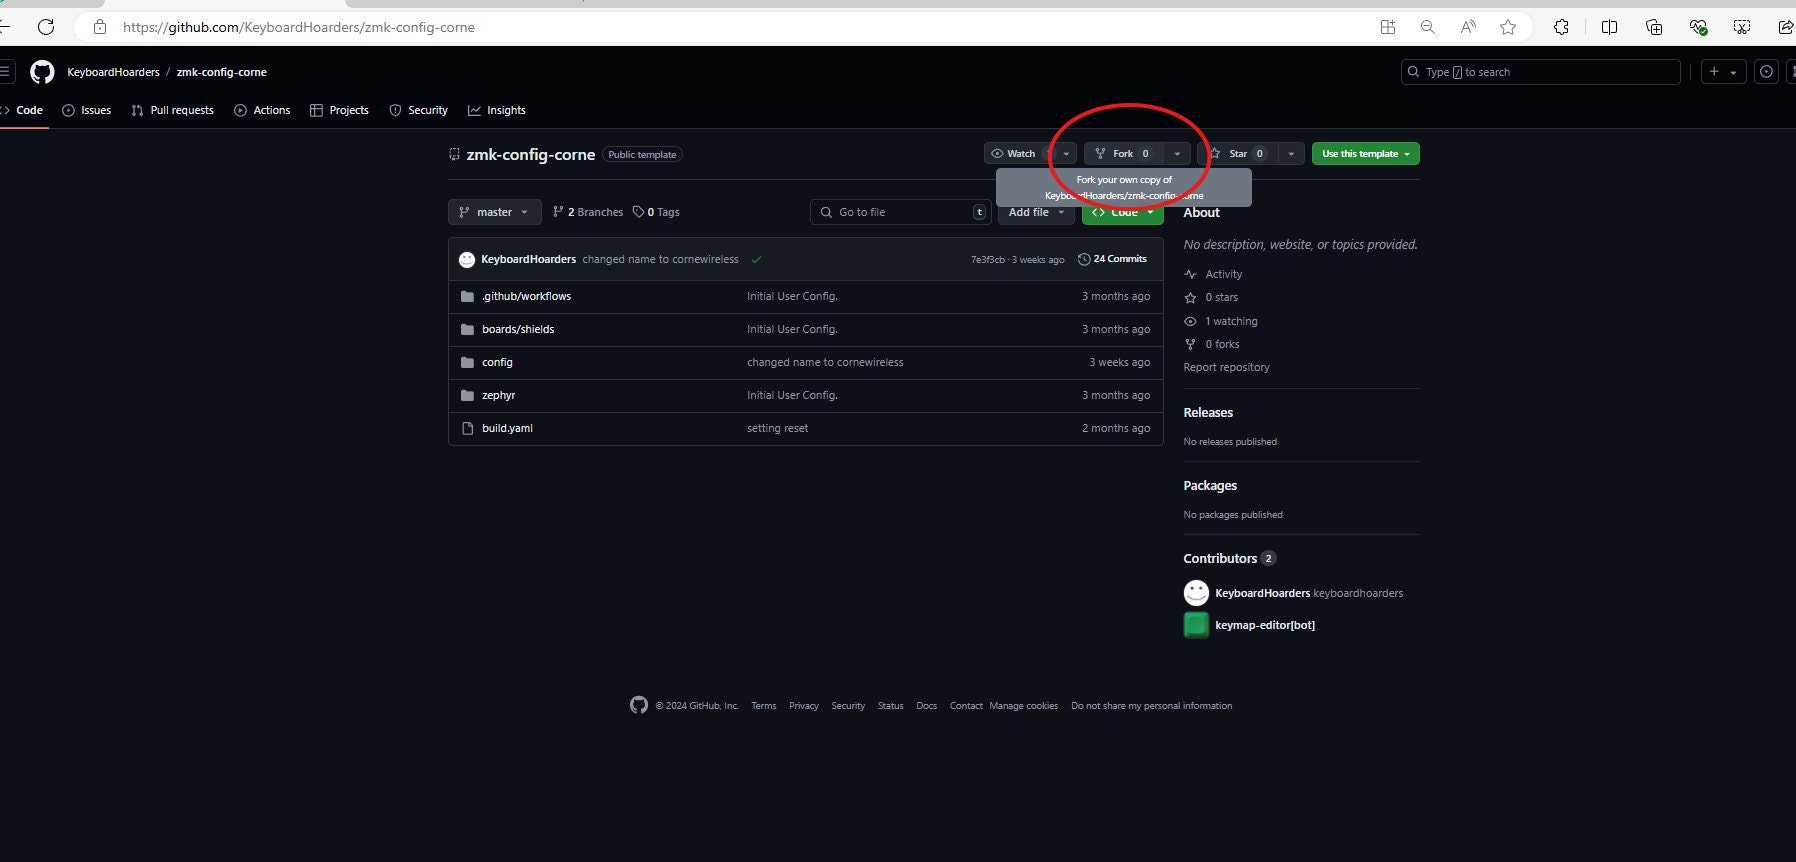
2. While signed into your GitHub account, fork the keyboard repository to your own GitHub so you can make changes.
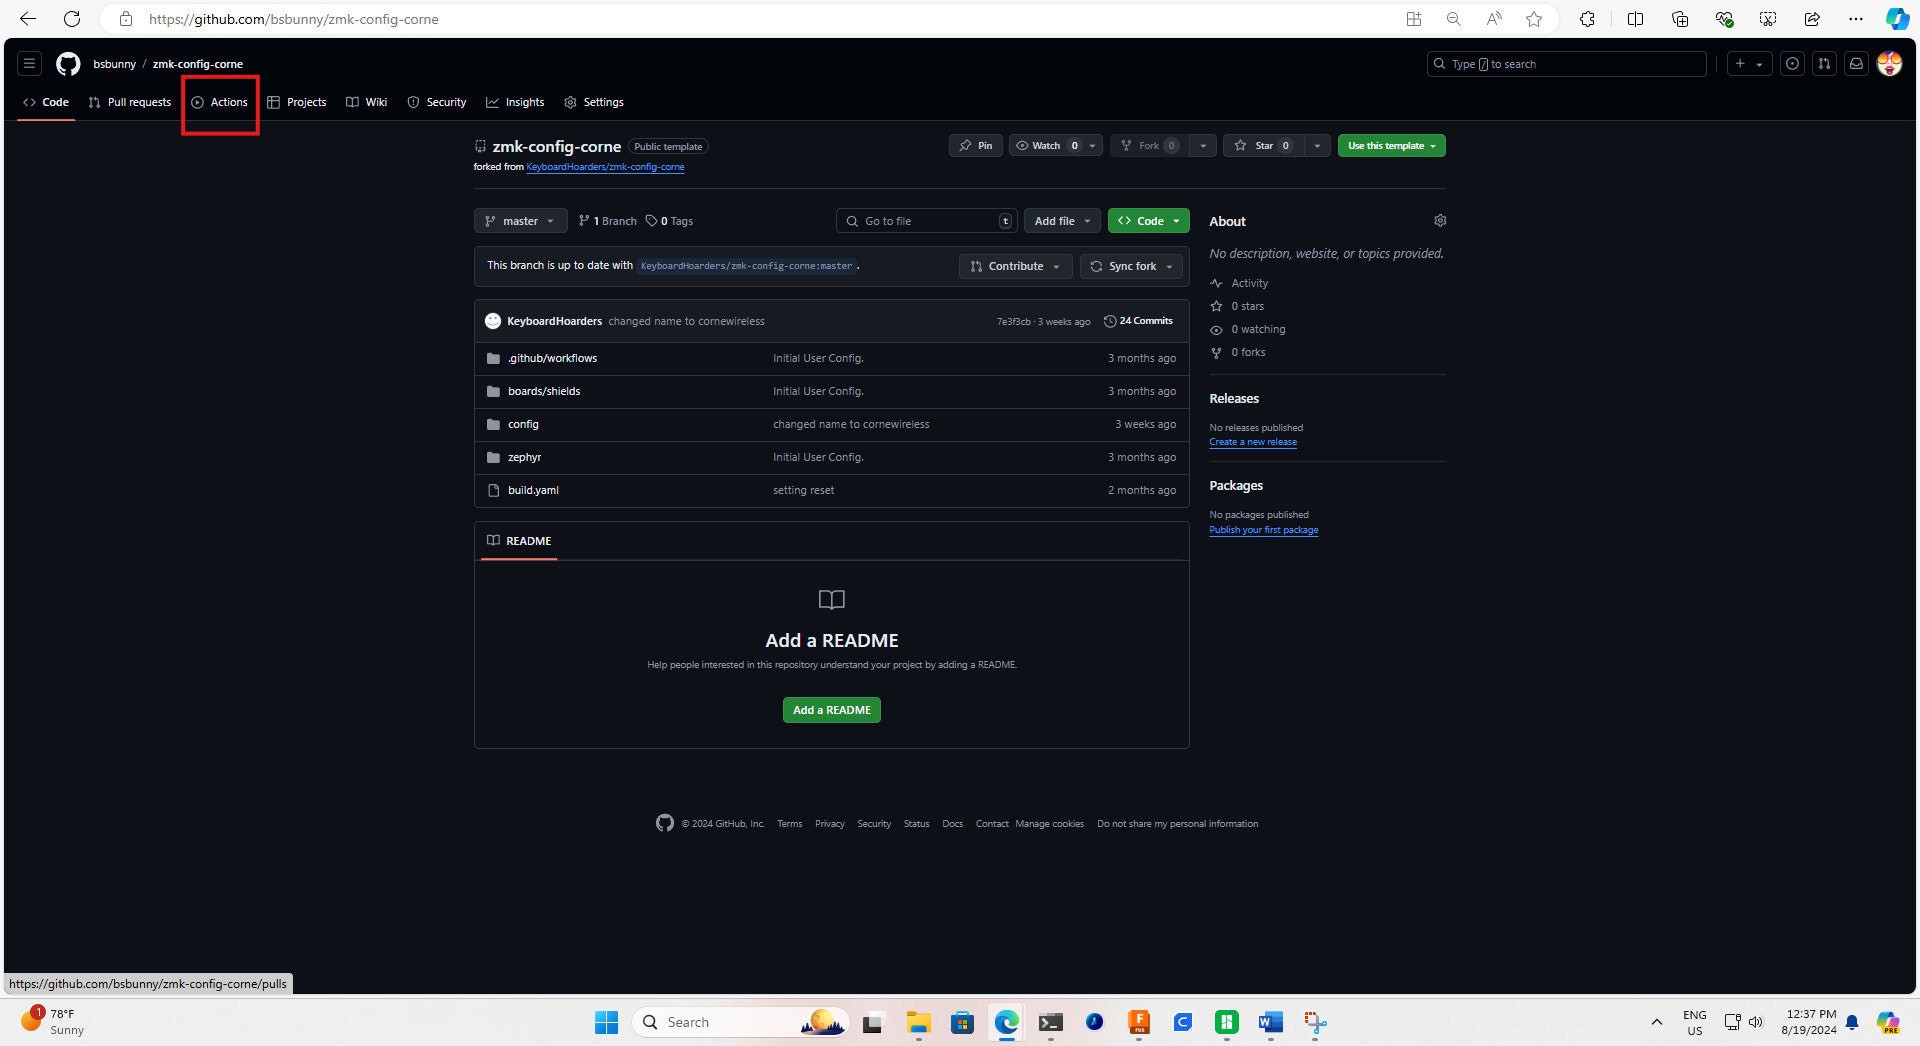
3. Go to your newly forked repository. Click on the "Actions" tab at the top, next to "Pull Requests."
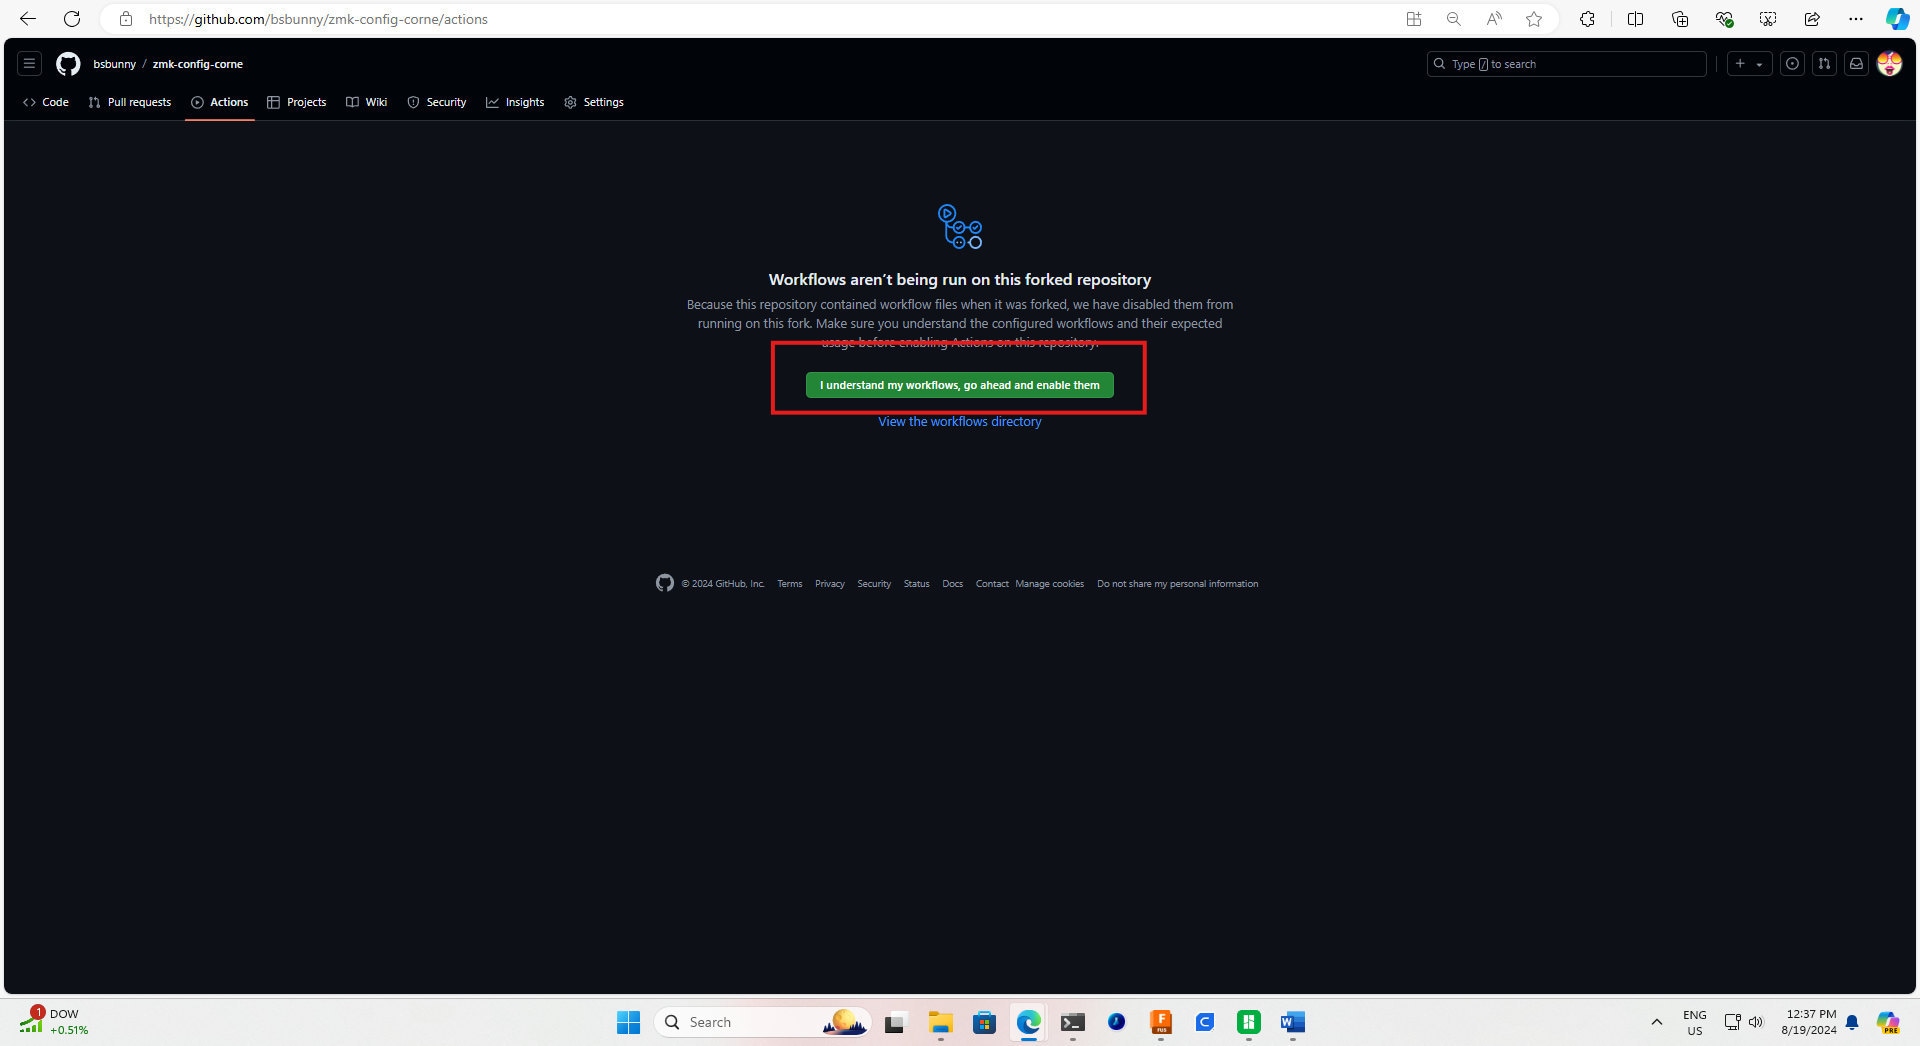
4. Click "I understand my workflows, go ahead and enable them."
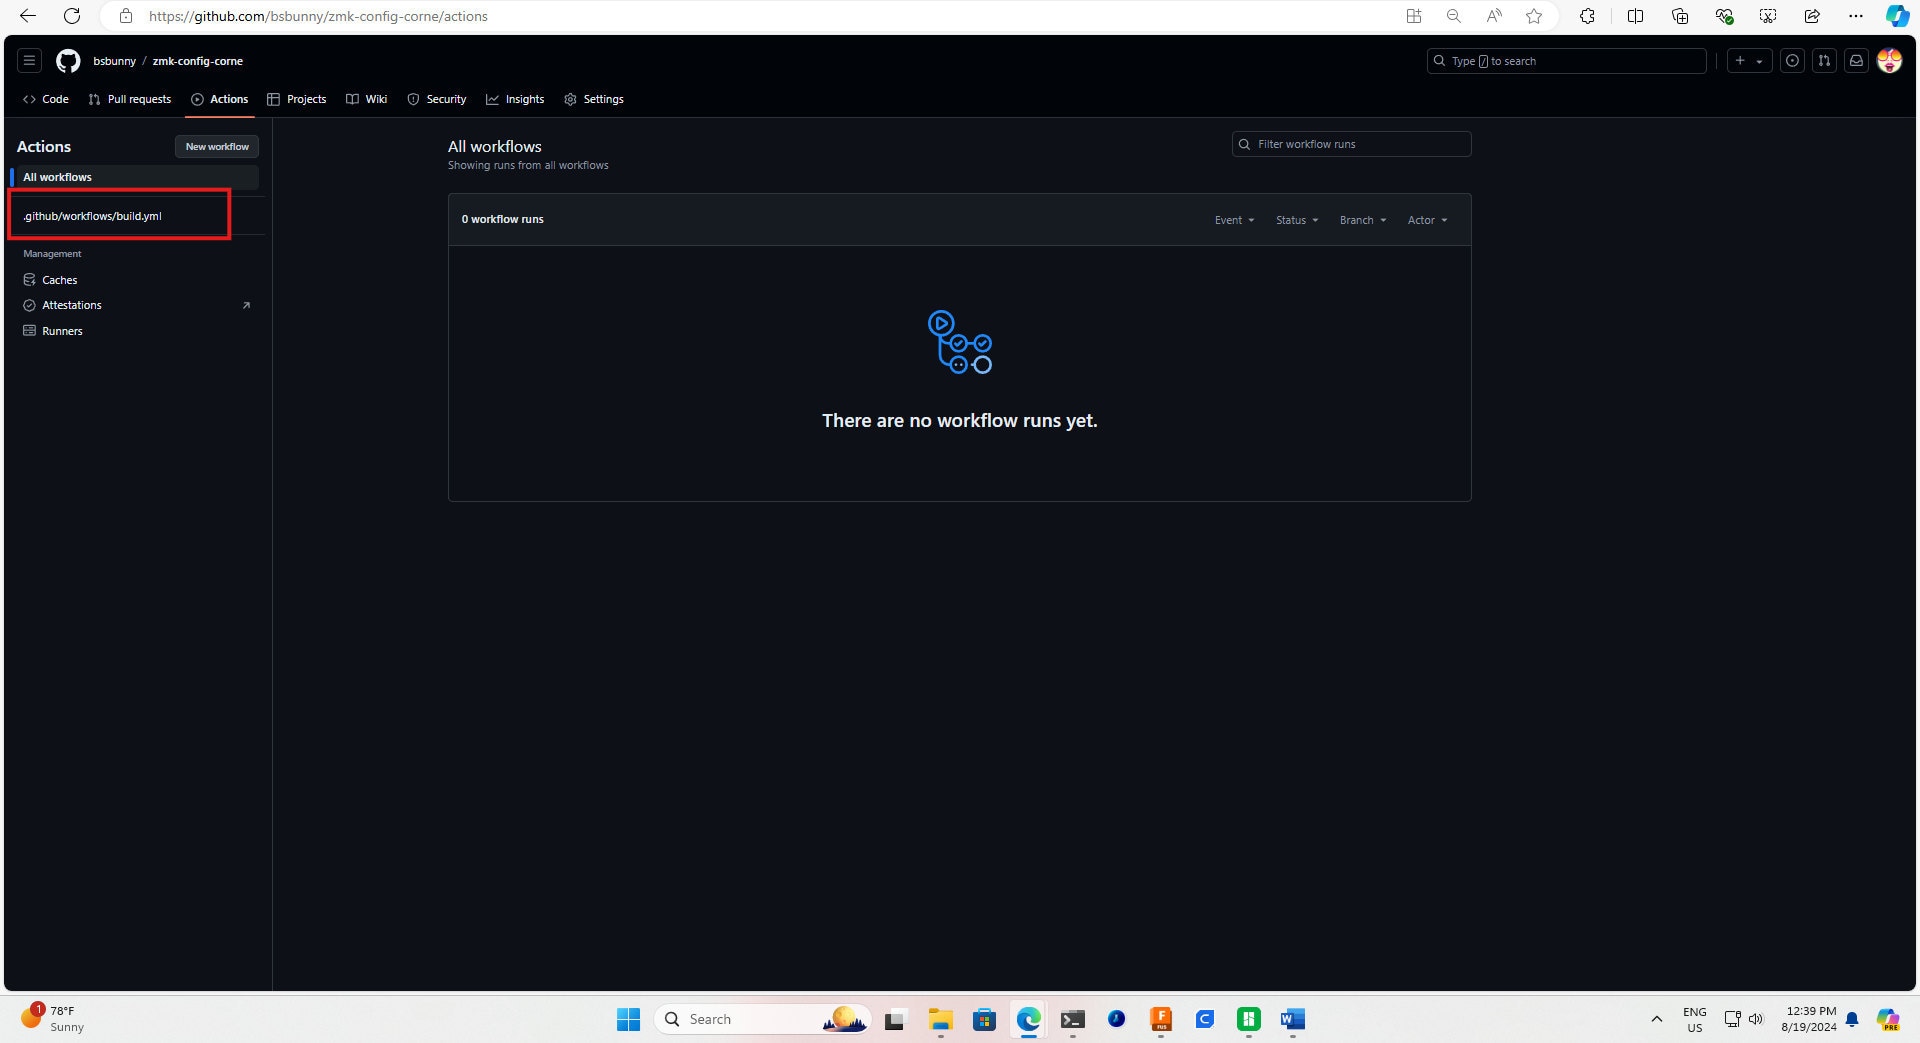
5. Select ".github/workflows/build.yml" from the top left.
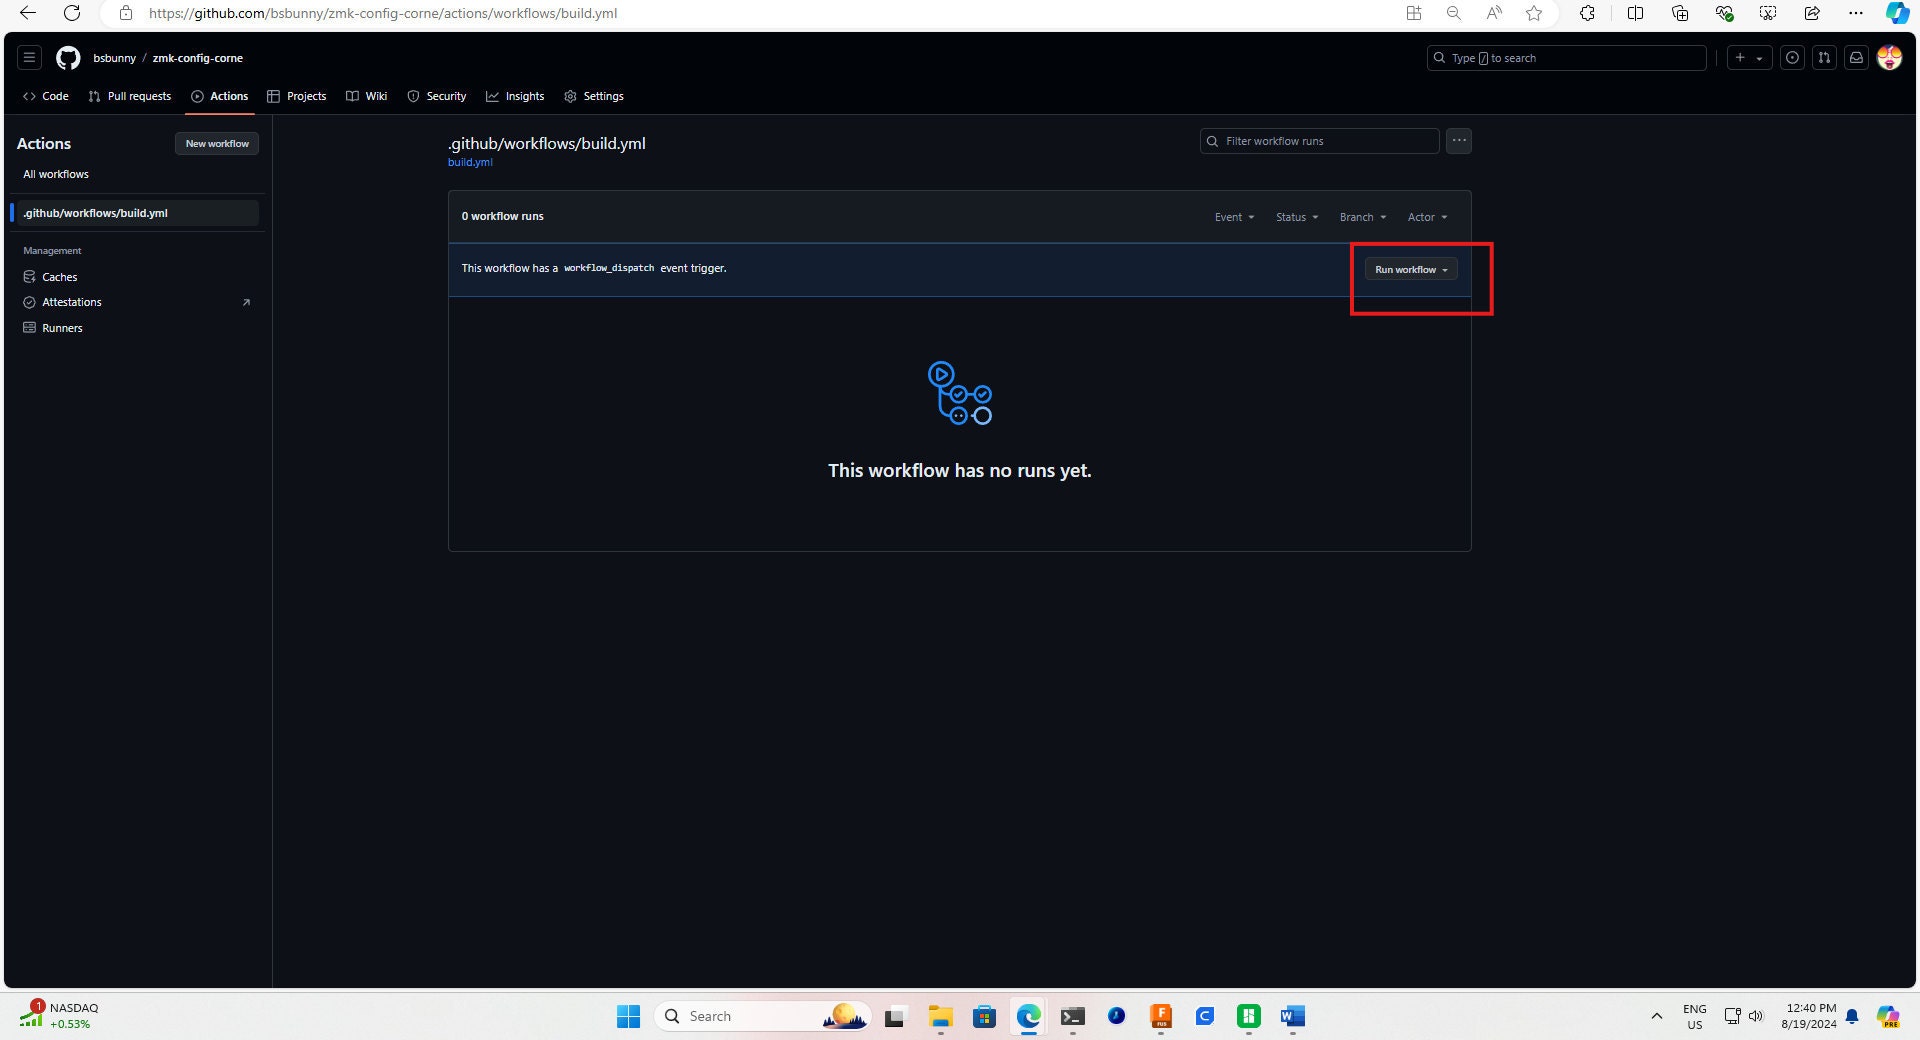
6. Select "Run workflow," then choose "Use workflow from Branch: master," and click "Run workflow."
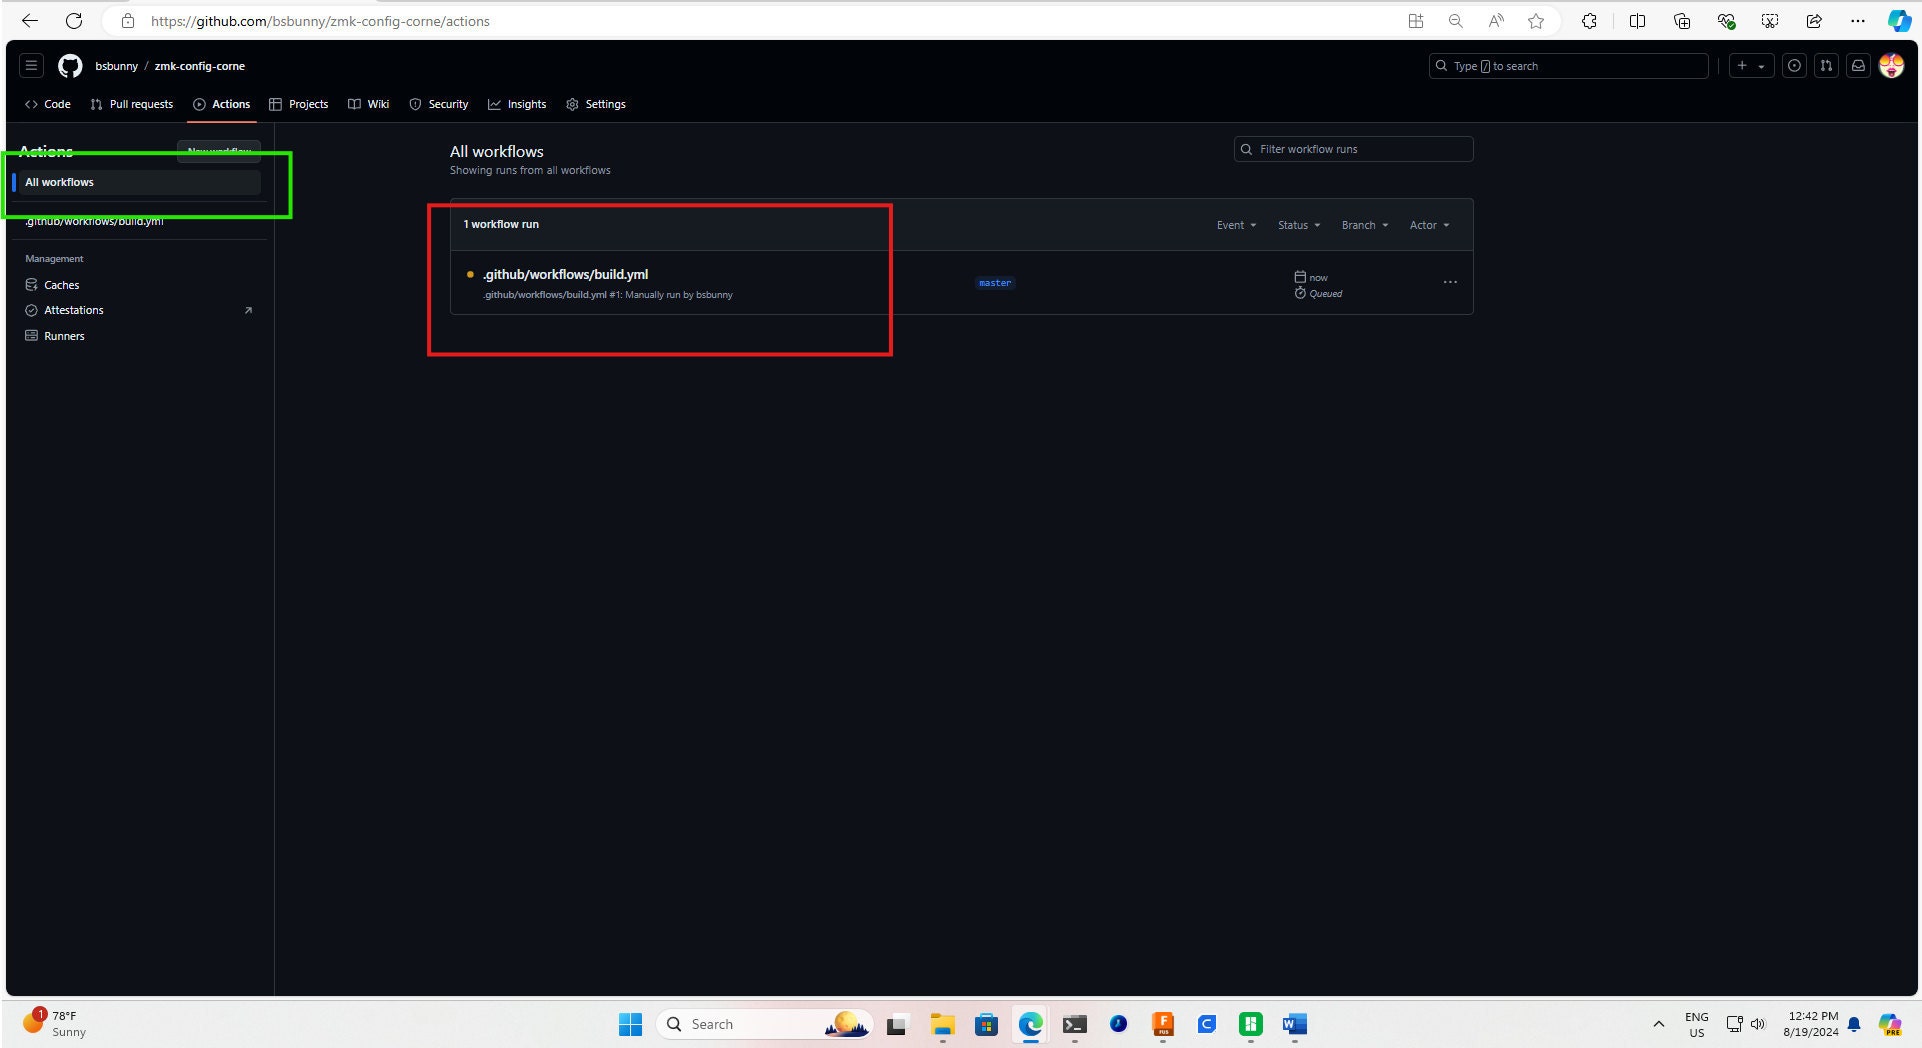
7. Go back to "All workflows" under "Actions." Wait for the workflow to finish. This ensures we have a base, working keymap to fall back on. We need this to turn green, indicating that the firmware has built successfully. If it fails, contact me or try again. This process can take up to 10 minutes.
8. Once we have a working "green" base keymap to revert to in case anything stops working correctly, we can continue to the GUI keymap editor.
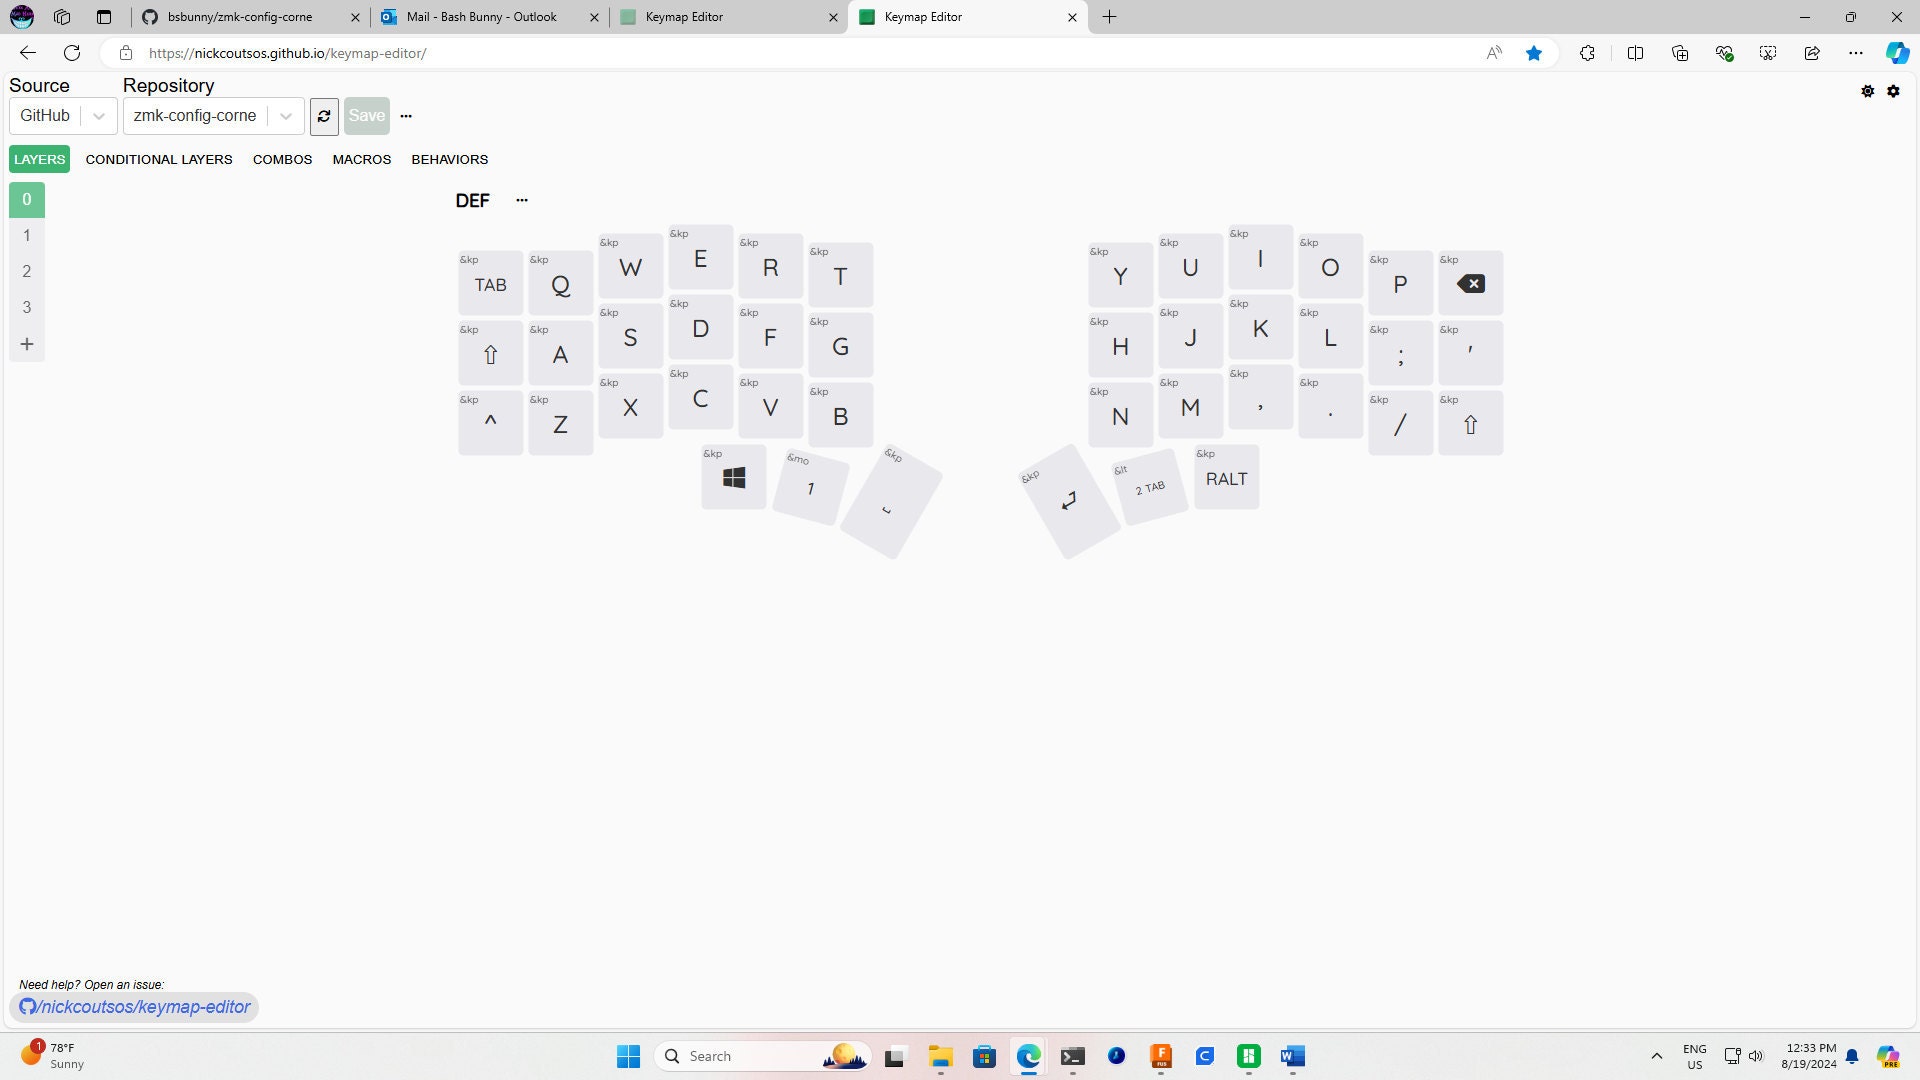
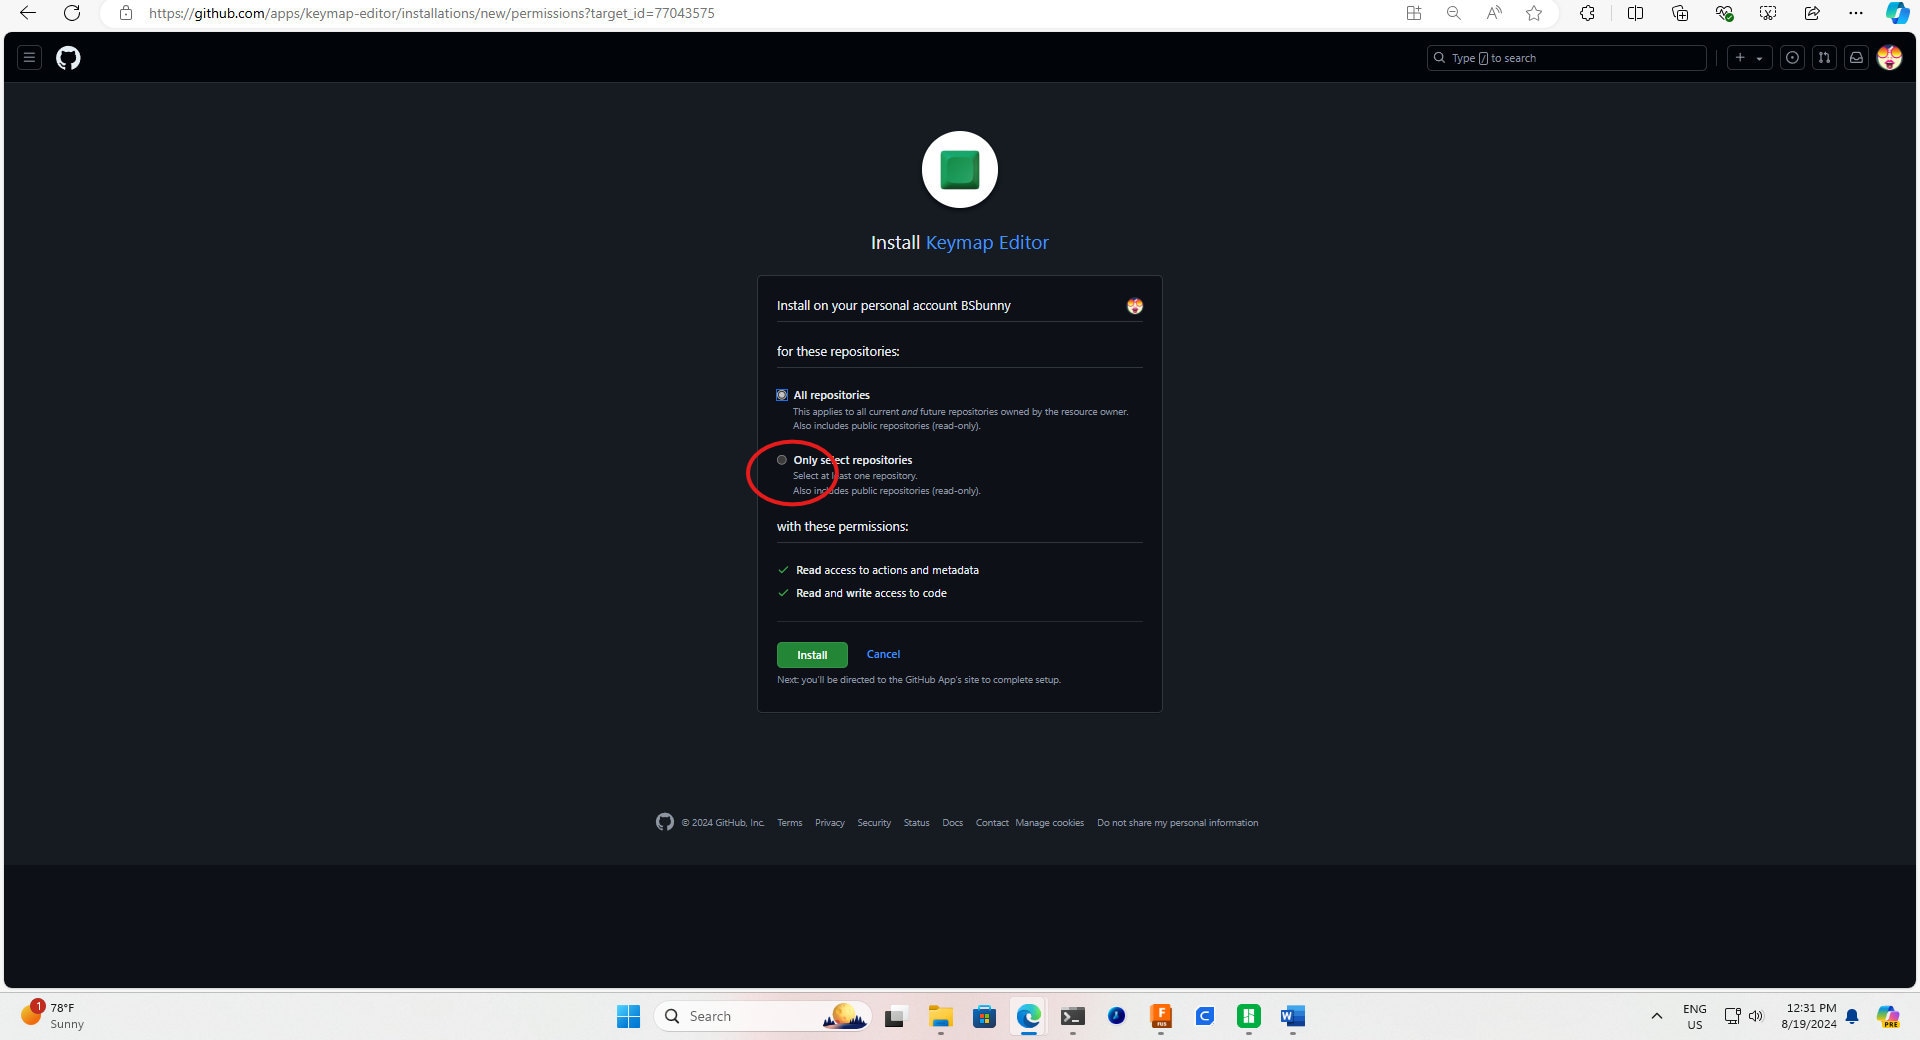
9. Go to [Keymap Editor](https://nickcoutsos.github.io/keymap-editor/). This will be the graphical user interface used to modify the base keymap.
- Log in with your GitHub account and authorize if needed.
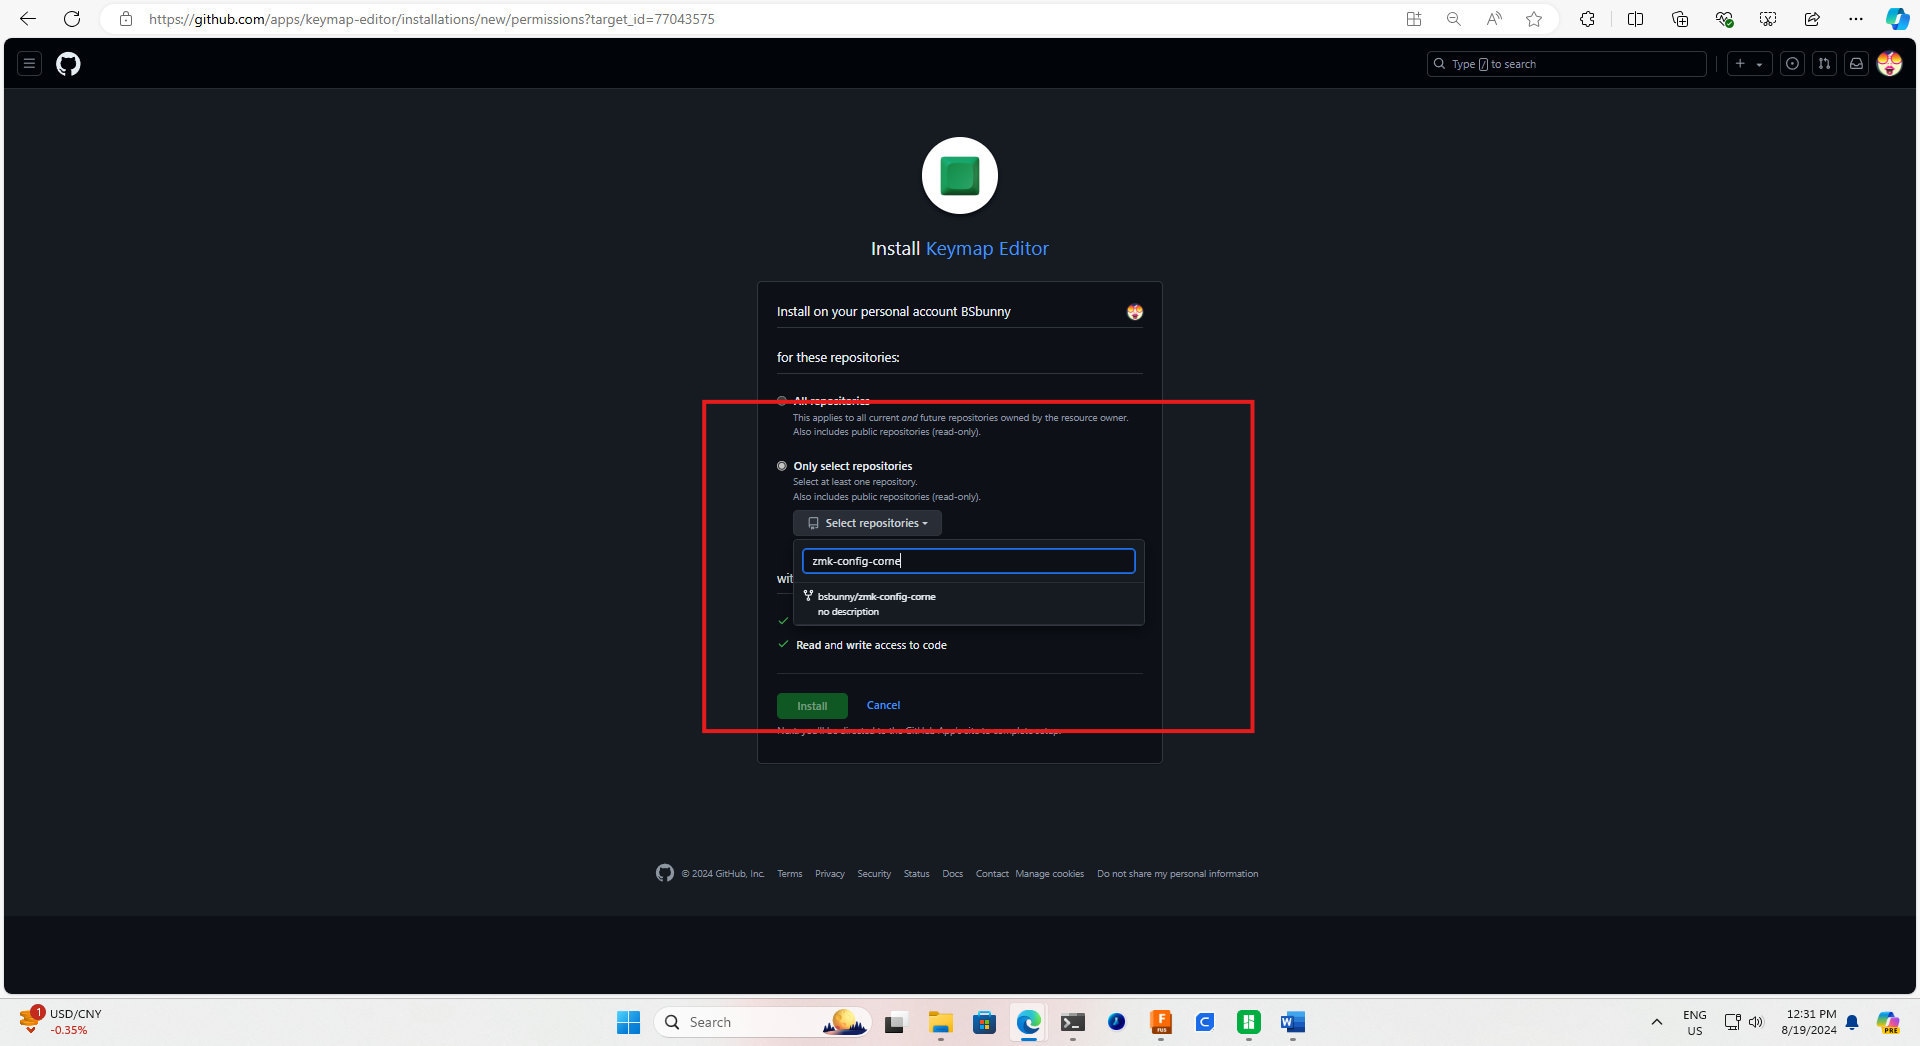
- Select the option "Only select repositories."
- Click the drop-down "Select repositories" and search for the repository you forked from my GitHub: `zmk-config-corne`.
- Click "Install."
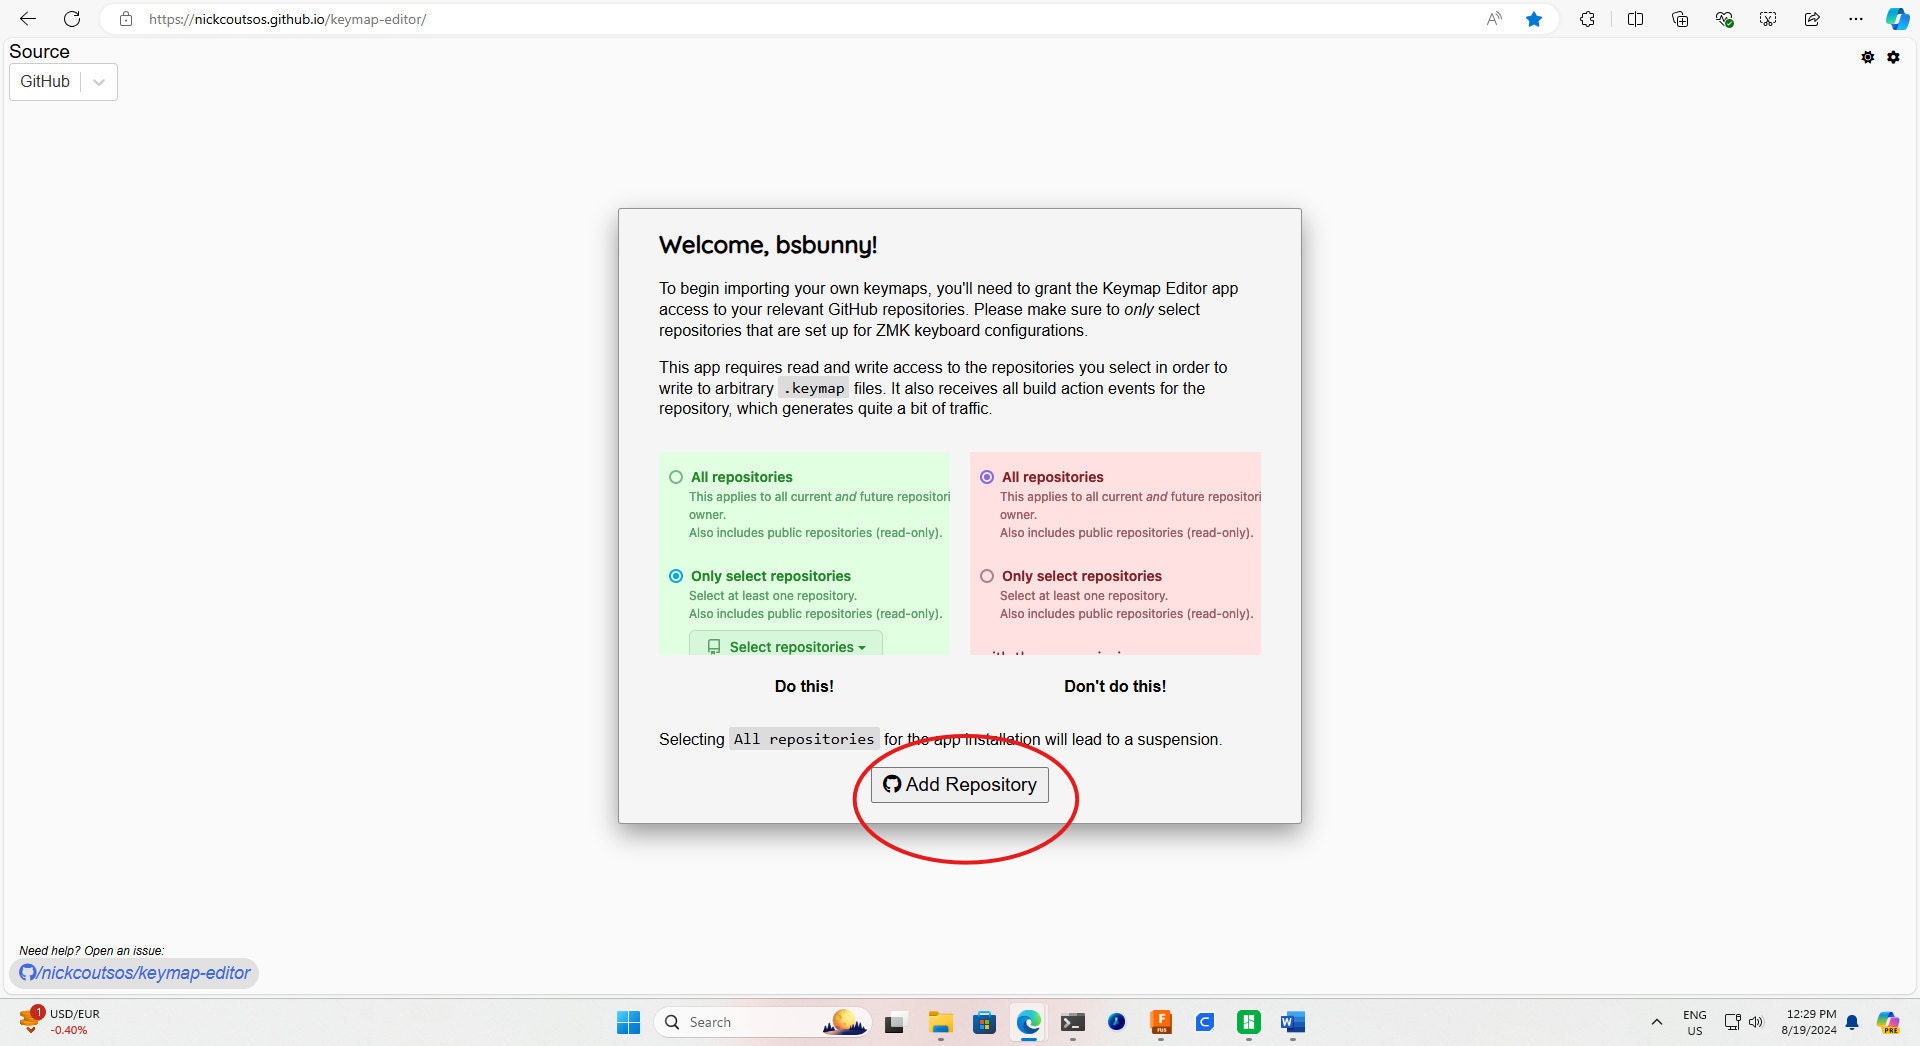
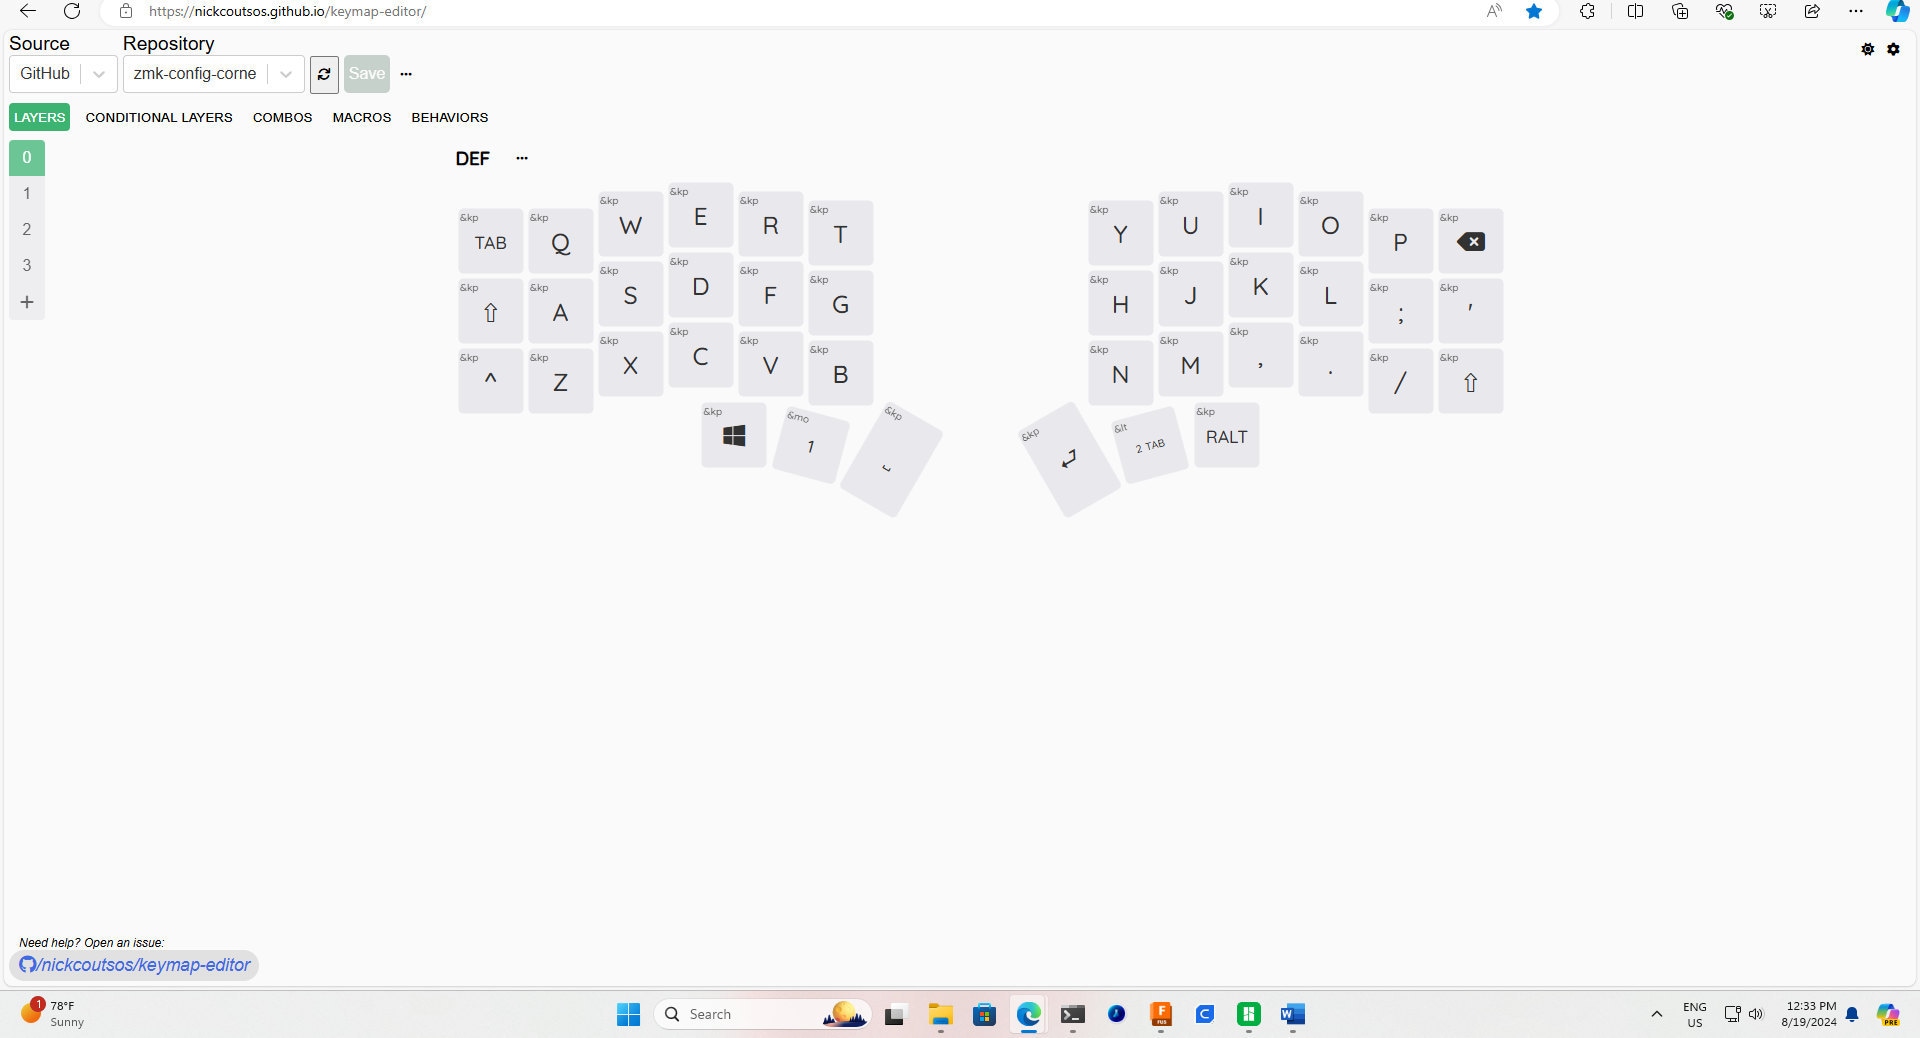
10. This will reload and display a nice GUI where you can start editing your keymap as desired. There are many settings to explore here.
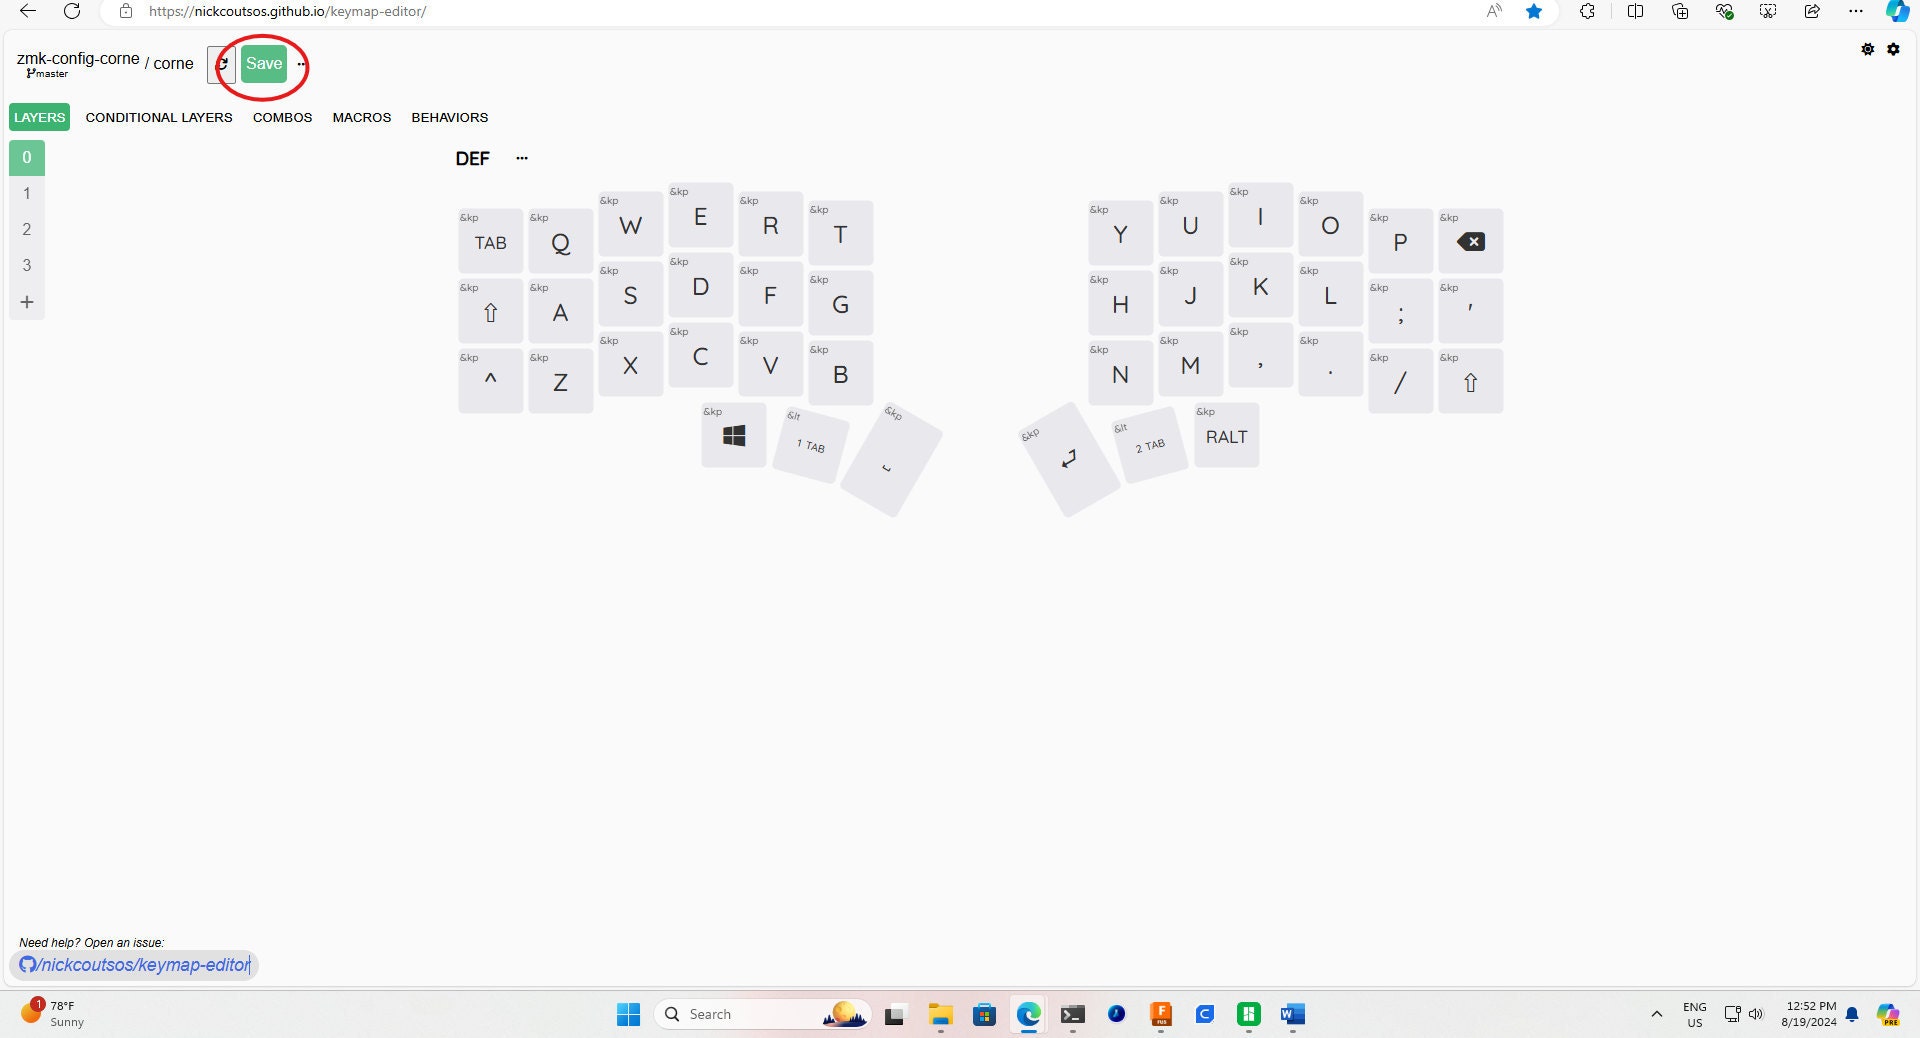
11. After making changes to the keymap, click "Save" and then "Commit."
12. Go back to your GitHub repository and navigate to the "Actions" tab, where you'll see another workflow automatically running. Wait for it to finish. As long as it turns green, all changes have been accepted.
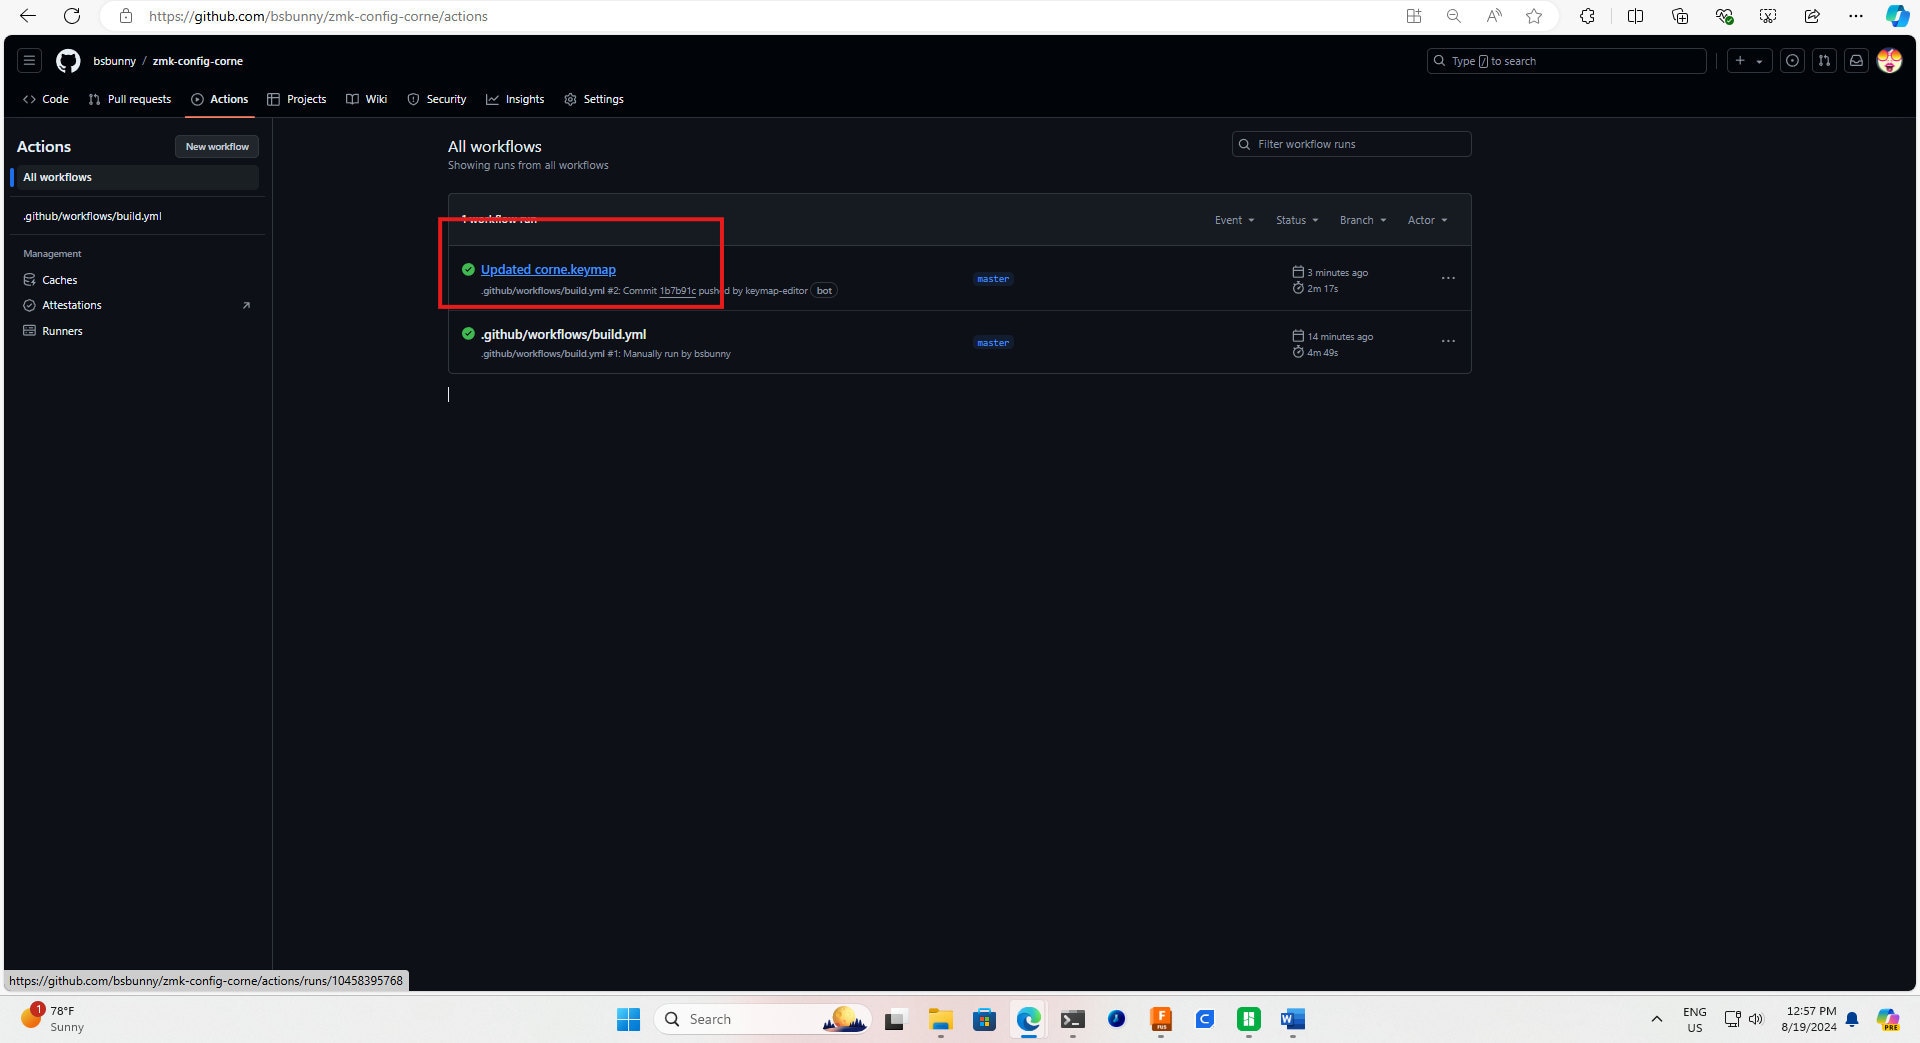
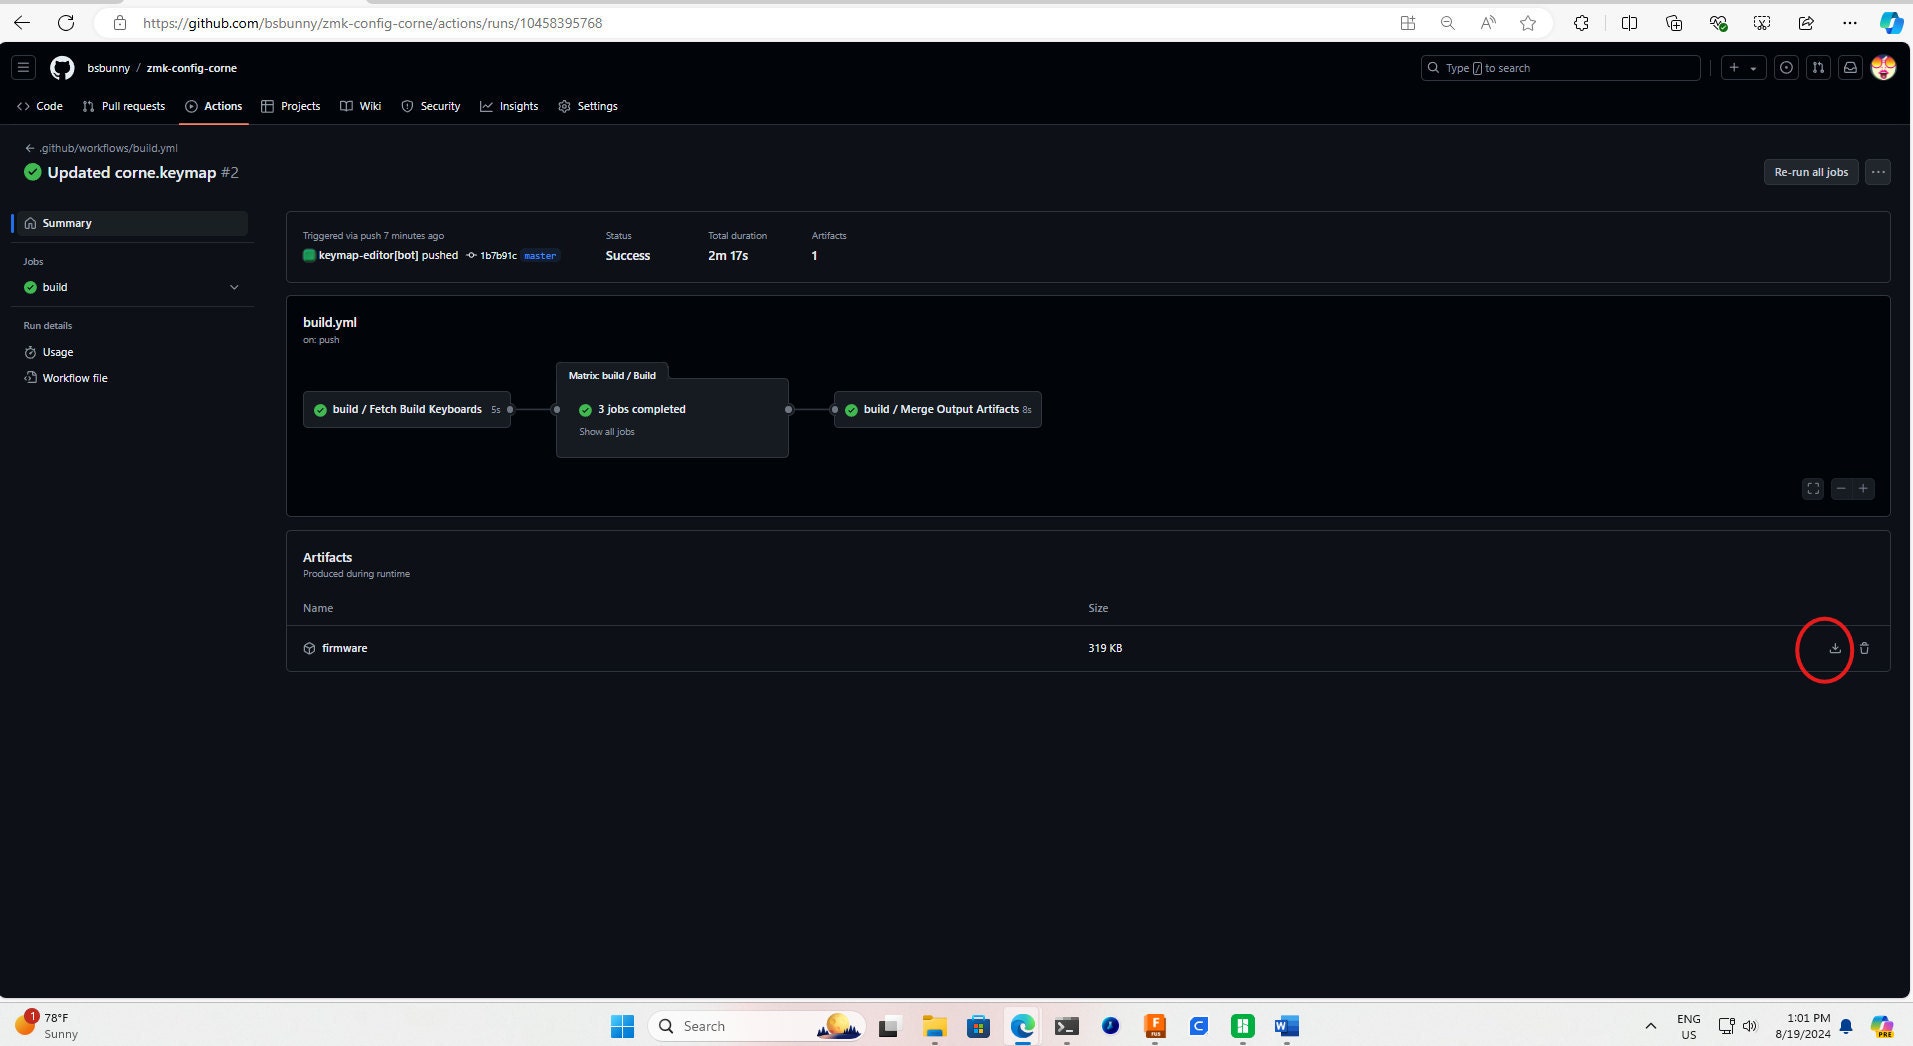
13. Click on the new workflow once it finishes running, then download the firmware and extract the file.
14. Now, you need to drag and drop the appropriate files onto each half of the keyboard. To do this:
- Plug in each half one at a time with a USB cable.
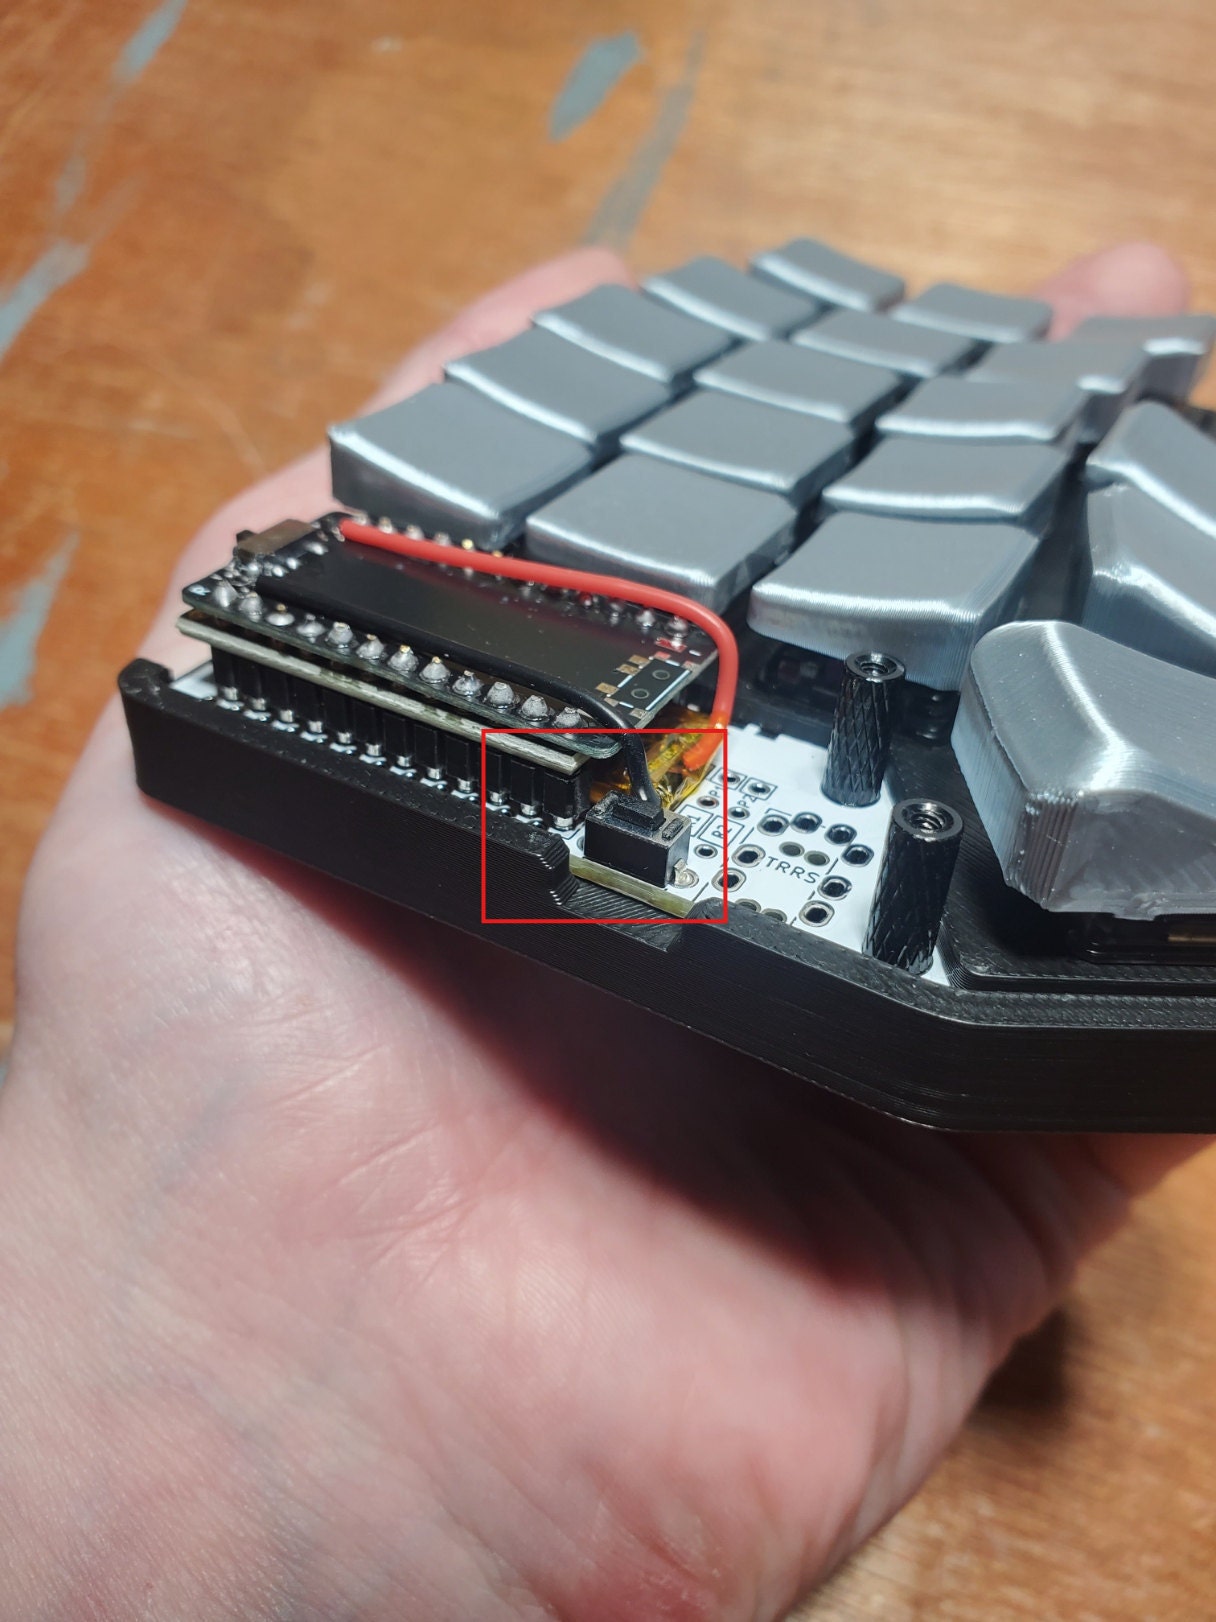
-Once plugged in, tap the reset button twice quickly. A new device should appear in your Windows directory (explained in detail below).
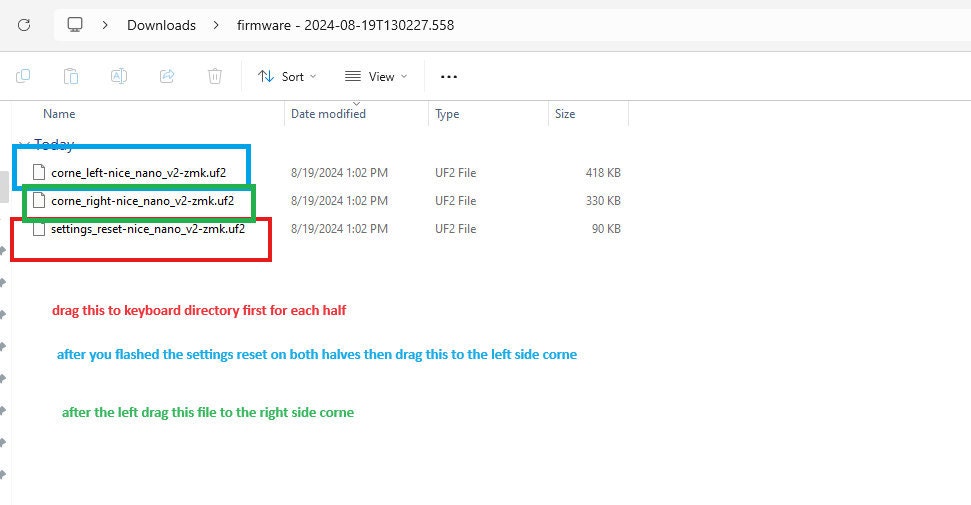
15. Always start by flashing the "settings_reset-nice_nano-.uf2" file. This resets the Bluetooth profile, so you'll need to remove the old pairing of your Corne wireless keyboard from your device's Bluetooth list.
- Plug in the left half of the keyboard, put it into bootloader mode (press the reset button twice), and drag and drop the settings reset UF2 file into the keyboard directory. - Unplug the left half of the keyboard.
- Plug in the right half, put it into bootloader mode, and drag and drop the settings reset file into the keyboard directory.
- Unplug the right half.
- Plug in the left half again, tap the reset button twice to enter bootloader mode, and drag and drop the "corne_left-nice_nano_v2-zmk.uf2" file into the keyboard directory.
- Unplug the left half.
- Plug in the right half again, tap the reset button twice to enter bootloader mode, and drag and drop the "corne_right-nice_nano_v2-zmk.uf2" file into the keyboard directory.
- Unplug the right half.
- Wait a few seconds.
- Open your Bluetooth pairing settings and remove the old Corne from the device list. If you don't, it won't show up as a new device. Then, pair the new Corne wireless device.
- All done!
**Troubleshooting**: If the keyboard connects, but the other half isn't typing, repeat all the steps. After flashing the settings reset for both the left and right halves, try tapping the reset button once on each half simultaneously to force them to pair. Then connect the keyboard to the computer as a new device. This should resolve the issue. Please reach out for help with any other problems, and I'll do my best to assist.
